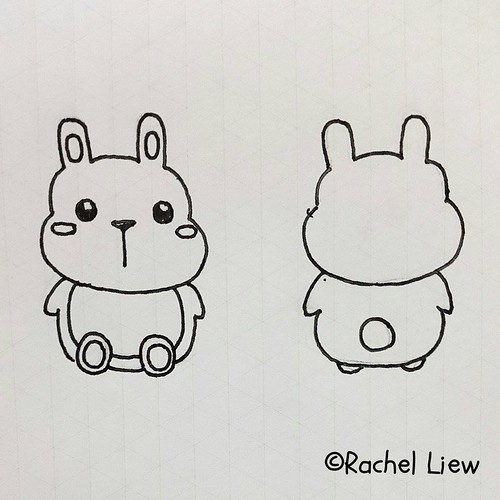
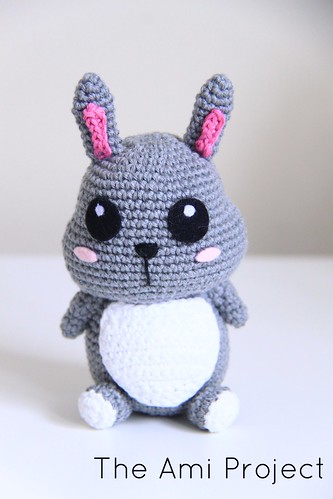
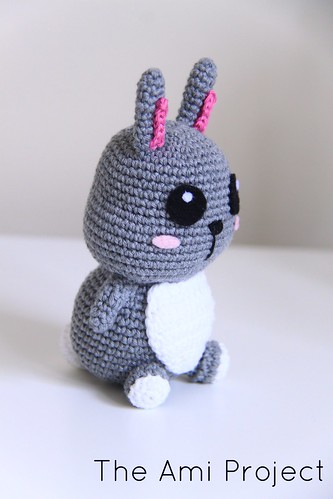
Completed: Malay Wedding Dolls

MWD_001

Recently, one of my friends, who is also my ex-colleague got married! When she invited me to her wedding (which I could not attend unfortunately), I knew that I would be crocheting a pair of wedding dolls in Malay traditional attire as a wedding gift. The topic of wedding gifts had come up in our conversations before and it felt surreal that I am finally going to crochet the wedding dolls for her.

As there were not many amigurumi dolls in traditional Malay attire for me to base the design on, I decided to just make up the design based on my friend’s engagement ceremony photos. She had wanted the dolls to be unique so I followed the pink theme of her engagement ceremony, rather than the traditional white theme of her wedding ceremony. Plus, pink is actually her favourite colour.

MWD_003

The most challenging part of creating the dolls was actually the groom’s sarung. A sarung is basically a length of cloth that is wrapped around the waist and tied and it forms part of the traditional Malay attire for men. Sarungs are usually of plaid design, something which is tricky to replicate in crochet. Thankfully, a search on the web brought me to this beautiful tartan plaid wash cloth pattern by Laura of Happy Berry Crochet. With some modifications and loads of trial-and-error, I managed to crochet a sarung that is similar to the real thing.

Albeit it not being part of the traditional Malay attire, I decided to go with a wedding veil for the bride since a veil would give off a wedding vibe and not result in the bride being mistaken as just an ordinary doll in traditional Malay attire. I added some crocheted flowers on the veil as well even though this is not visible from the front. Don’t they look dainty?

MWD_002

That wraps up my short post on crocheting a pair of wedding dolls in traditional Malay attire.

Have you crocheted anything that has a cultural significance in your culture/country? What has your process been like? Do share in the comments section below!

Till the next project. xoxo

Travel: KPC Yarn Studio in Kowloon, Hong Kong

Disclaimer: All opinions are my own and I have not been paid or rewarded in any form to write this blog post. All the links provided here are accurate at the time of posting and should be used at your own discretion. I would not accept any responsibility should anything untoward occur due to your usage or reliance on the information provided here.

KPC_001

Date of Visit : 7th September 2015

Right after I booked my airplane tickets to Hong Kong earlier this year, I did a quick search on Google on any local yarn shops to visit in Hong Kong. I had a hunch that it would not be easy to locate the local yarn shops especially when the main language in HK isn’t English (just like the time when I did my research on Big Knit Cafe in Bangkok, Thailand) so I was pleasantly surprised when the fully-in-English KPC website turned up on the search engine.

KPC_007

KPC stands for Knit, Purl, Crochet and they carry only four yarn ranges, namely Novomerino (100% ultra fine merino wool), Glencoul (70% merino wool, 30% cotton), Cashmere (100% cashmere) and Gossyp (100% organic cotton). Each yarn range come in weights of 4ply, DK and Chunky with the exception of the Novomerino which is also available in the Aran weight as well. The number of colours available for each range is really great too (the most being 60 available colours).

I was pretty much sold on making a visit to the KPC Yarn Studio especially after seeing the gorgeous colours available on the website and especially since I haven’t been to an actual yarn studio before.

Finding my way to the area where KPC was located wasn’t too difficult. I got there by train. The problem was after exiting the train station and locating KPC’s exact location. I could not find the street where KPC was but thankfully, by asking around for directions, I manage to find KPC.

KPC_002 KPC_004

It was pretty quiet at the studio when I arrived. The sales assistant explained that it is usually quite quiet on weekdays. She explained briefly about the products available and then was super cool (thanks Fiona!) about leaving me and my friend alone to look around by ourselves. (I absolutely dislike yarn shops where the sales assistants/shop owners follow you around. They make me feel like I’m a thief instead of a customer.)

KPC_010 KPC_005

It was really another level of yarn heaven for me in KPC. I got to see and feel the yarn on display (they were super soft!). There was a whole file of yarn colours to see and choose from. They even had little gauge swatches so that you can see how the yarn would turn out in knitted form. And if that wasn’t enough, there were knitted and crocheted items around the studio as samples.

KPC_009 KPC_008

The whole place looks super comfy and I almost wished that I was living in Hong Kong so that I could frequently visit this gem of a yarn studio/crafting venue. KPC conducts workshops as well and they rent out their studio space to crafters who want a good space for say, craft gatherings or stitch-and-b*tch sessions.

KPC_003 KPC_006  KPC_011

Besides yarn, KPC also has crochet and knitting tools for sale. They stock mostly Clover hooks and knitting needles, as well as other notions like stitch markers, pom pom makers and stitch holders. There is also a corner of wool felting materials for sale.

KPC_012

I ended up purchasing six balls of 4ply yarn from their Glencoul range. Those are probably going to end up as super comfy summer socks and yes, I’m learning sock knitting at the moment. Each ball of yarn comes with a little product card which has the yarn specifications and care instructions which I think is pretty neat and unconventional. I’ll probably do a review (no promises though) on the yarn when I finally use them but at this point of time, I just love love LOVE the softness of the balls of yarn!

KPC_014

Overall, I was happy and pretty satisfied with my visit to the KPC Yarn Studio. I liked the quiet ambience at the studio, the beautiful yarns on display and the cherry on top of it all has got to be the fantastic customer service. The only downside would probably be that the KPC yarns are a tad bit pricey but then again, I definitely don’t mind paying for quality products. If I ever visit Hong Kong again, I would definitely drop by the KPC Yarn Studio and maybe attend a workshop or something.

If you are visiting Hong Kong and would love to drop by KPC, here are the details:

  • Where : KPC Yarn Studio, 1/F Novel Industrial Building, 850 – 870 Lai Chi Kok Road, Lai Chi Kok, Kowloon, Hong Kong (KPC Yarn Studio, 1/F 永新工業大廈, 850 – 870 荔枝角道, 荔枝角, 九龍)
  • Opening Hours : Monday – Sunday from 11.00AM to 8.00PM
  • Website : www.kpcyarn.com
  • Directions : If you are taking the MTR, get off at Lai Chi Kok Station (Tsuen Wan line) and exit the station at Exit D2. Once you are out of the station, look for this corner shop called Mi’Des. The address of the shop would read “822, Lai Chi Kok Road”. Walk along the same row where Mi’Des is located and you will find the Novel Industrial Building which is where the KPC Yarn Studio is located in.
  • Helpful Hints : Do have the address in Chinese on hand as most locals do not know the English names of streets/buildings.

If you would like further information on visiting the KPC Yarn Studio, do leave a comment here or you can drop me an e-mail at theamiproject@yahoo.com. I would be very glad to help you out if I can.

All the best with planning a visit to the KPC Yarn Studio if you are visiting Hong Kong!

Till the next project. xoxo

Pattern: Wooyoo The White Belly Bunny

Bunny_006 [IG] To celebrate hitting the 500 followers mark on Instagram and as a gesture to express my gratitude, here is the free pattern for Wooyoo The White Belly Bunny. What are you waiting for? Go grab some yarn and crochet your very own Wooyoo!

**Do follow the step-by-step blog post here as well to help you crochet your very own Wooyoo.

PATTERN

The size of the finished bunny using the specified crochet hook and yarn measures 13.5cm in height (from top of ears to bottom of body).

Materials:

  • Grey, white and pink yarn (I used Moda Vera Gelato)
  • 2.3mm crochet hook
  • Yarn needle
  • Fibrefill
  • Pink (for cheeks), black and white (for eyes) felt
  • Black embroidery thread (for nose)
  • Glue (I used UHU glue)

Stitches/techniques used:

  • SC single crochet (including SC increase & decrease)
  • HDC half double crochet
  • DC double crochet
  • SL ST slip stitch
  • CH chain
  • Magic ring

Note: All parts are worked in continuous rounds unless specified otherwise.

HEAD

With grey yarn,

Leaving a long tail at the start, ch 7

R01 : Starting from 2nd ch from hook, Sc 6. Turn and Sc 6 [12]

R02 : *2 sc in next st, sc 1* repeat 6 times [18]

R03 : *2 sc in next st, sc 2* repeat 6 times [24]

R04 : *2 sc in next st, sc 3* repeat 6 times [30]

R05 : *2 sc in next st, sc 4* repeat 6 times [36]

R06 : *2 sc in next st, sc 5* repeat 6 times [42]

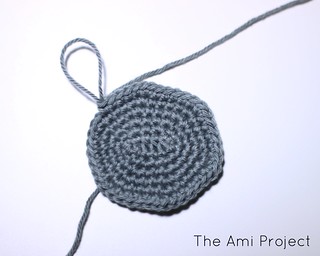
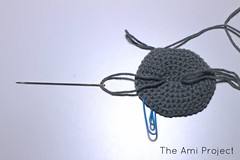
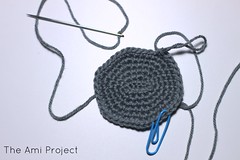
Using a sewing needle, thread the long tail of yarn that was left at the beginning and sew close the hole of the beginning ch.

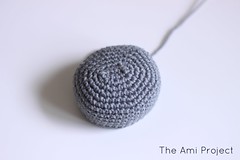
Continue crocheting the head.

R07-12 : Sc 42 [6 rounds]

R13 : Sc 2, 2 sc in next 6 st, sc 14, 2 sc in next 6 st, sc 14 [54]

R14-20 : Sc 54 [7 rounds]

R21 : Sc 3, dec 6, sc 14, dec 6, sc 13 [42]

R22 : *Dec 1, sc 5* repeat 6 times [36]

R23 : *Dec 1, sc 1* repeat 12 times [24]

R24 : *Dec 1* repeat 6 times [12]

Stuff the head firmly with fibrefill.

R25 : *Dec in next st* repeat 6 times [6]

Fasten off with a long tail. Thread the yarn through the stitches of the last round and pull to close the hole. Weave in yarn ends.

BODY

With grey yarn,

R01 : 6 sc in magic ring [6]

R02 : *2 sc in next st* repeat 6 times [12]

R03 : *2 sc in next st, sc 1* repeat 6 times [18]

R04 : *2 sc in next st, sc 2* repeat 6 times [24]

R05 : *2 sc in next st, sc 3* repeat 6 times [30]

R06 : *2 sc in next st, sc 4* repeat 6 times [36]

R07 : *2 sc in next st, sc 5* repeat 6 times [42]

R08-16 : Sc 42 [9 rounds]

R17 : *Dec 1, sc 5* repeat 6 times [36]

R18 : Sc 36 [1 round]

R19 : *Dec 1, sc 4* repeat 6 times [30]

R20 : Sc 30 [1 round]

Fasten off with a long tail. Stuff the body firmly with fibrefill.
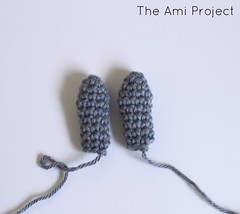
EARS (make 2)

With grey yarn,

R01 : 4 sc in magic ring [4]

R02 : *2 sc in next st, sc 1* repeat 2 times [6]

R03 : *2 sc in next st, sc 2* repeat 2 times [8]

R04 :  *2 sc in next st, sc 3* repeat 2 times [10]

R05 : Sc 10 [1 round]

R06 : *Dec, sc 3* repeat 2 times [8]

R07-10 : Sc 8 [4 rounds]

Fasten off with a long tail. The ears do not need to be stuffed.
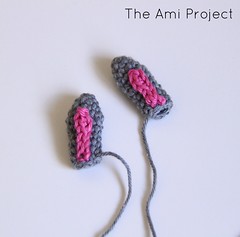
INNER EARS (make 2)

With pink yarn,

Ch 6

R01 : Starting from 2nd ch from hook, sc in next 2 st, sl st in last 3 st [5]

Fasten off with a long tail. Sew the inner ears onto the ears and weave in the pink yarn ends.
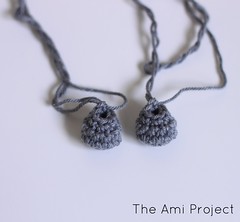
FEET (make 2)

With grey yarn,

R01 : 6 sc in magic ring [6]

R02 : *2 sc in next st* repeat 6 times [12]

R03 : *2 sc in next st, sc* repeat 6 times [18]

R04 : Sc 3, dec 6, sc 3 [12]

R05 : Sc 2, dec 4, sc 2 [8]

Fasten off with a long tail. Stuff feet lightly with fibrefill.

FEET PATCH (make 2)

With white yarn,

R01 : 6 sc in magic ring [6]

R02 : *2 sc in next st* repeat 6 times [12]

Fasten off with a long tail.

ARMS (make 2)

With grey yarn,

R01 : 4 sc in magic ring [4]

R02 : *2 sc in next st, sc* repeat 2 times [6]

R03-04 : Sc 6 [2 rounds] Now we start working in rows.

R05 : 2 dc in next st, dc 2, sc 1, ch 1 and turn [5]

R06 : Sc 5, ch 1 and turn [5]

R07 : Sl st 5 [5]

Fasten off with a long tail. Lightly stuff the arms with fibrefill.
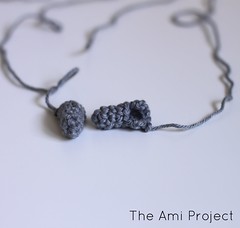
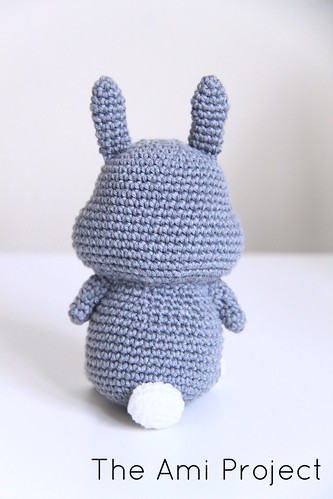
BOB TAIL

With white yarn,

R01 : 6 sc in magic ring [6]

R02 : *2 sc in next st* repeat 6 times [12]

R03 : *2 sc in next st, sc 1* repeat 6 times [18]

R04 : Sc 18 [1 round]

R05 : *Dec, sc 1* repeat 6 times [12]

Fasten off with a long tail. Stuff the bob tail lightly with fibrefill.
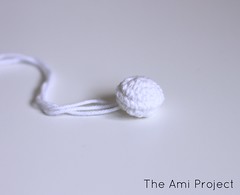
BELLY

Note: The belly is worked in rows. 

With white yarn,

Ch 6

R01 : Starting from 2nd ch from hook, sc 5, ch 1 and turn [5]

R02 : 2 sc in next st, sc 3, 2 sc in next st, ch 1 and turn [7]

R03 : 2 sc in next 2 st, sc 3, 2 sc in next 2 st, ch 1 and turn [11]

R04-05 : Sc 11, ch 1 and turn [2 rows]

R06 : Sc 5, 2 sc in next st, sc 5, ch 1 and turn [12]

R07-08 : Sc 12, ch 1 and turn [2 rows]

R09 : Sc 5, dec in next st, sc 5 [11]

R10 : Dec in next st, sc 7, dec in next st [9]

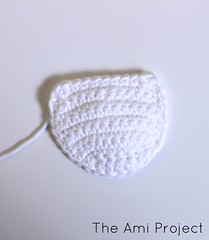
Now we work AROUND the whole of the belly. (Refer to guide.) Belly_001 
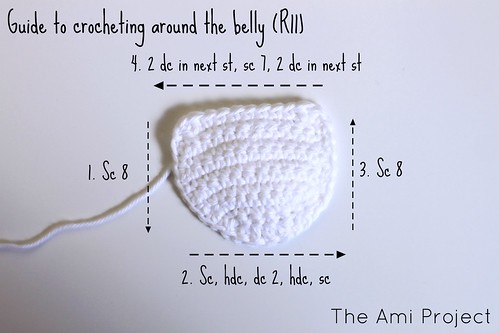
R11 : Sc 8 along the side of the belly until you reach the beginning ch. Working on the underside of the beginning ch, sc, hdc, dc 2, hdc, sc. Then sc 8 along the other side of the belly until you reach R10. At R10, 2 dc in next st, sc 7, 2 dc in next st. [33]

Sl st in next st. Fasten off with a long tail.

EYES

Cut out 2 circular pieces of black felt and 2 smaller circular pieces of white felt.

**I cut out a black circle measuring 1.5cm in diameter and a white circle measuring 0.5cm in diameter. If you are using a hook size that is larger or smaller than 2.3mmm, then please do adjust the sizes of the eyes accordingly.

CHEEKS

Cut out 2 oval pieces of pink felt.
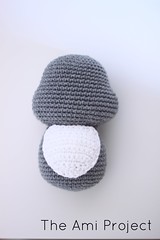
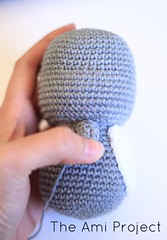
ASSEMBLY

  1. Sew the body onto the head.
  2. Position the white belly on the centre of the body and sew it onto the body. 3.
  3. Position the arm at the side of the body, one stitch away from the belly and sew it onto the body. Repeat for the other arm.
  4. Position the foot on the bottom side of the belly and sew onto the body. Repeat for the other foot.
  5. Position the foot patch on the bottom of the foot and sew onto the foot. Repeat for the other foot patch.
  6. Position the black felt between R08 to R13. Glue onto head with 5 stitches in between both eyes counted at R08.
  7. Place white felt near the top at the centre of the black felt and glue onto the black felt.
  8. Position the cheeks one stitch below the eyes and glue onto head.
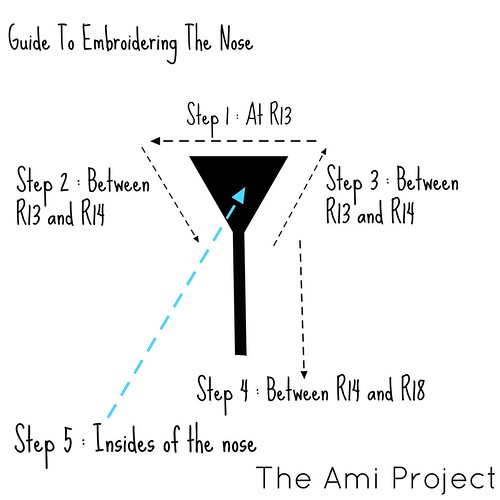
  9. With black embroidery thread, embroider nose onto head. (Refer to guide.)
  10. Nose GuideSew ears onto head between R02 to R07.
  11. Sew the bob tail onto the back of the body between R04 to R08.

Congratulations! You’ve completed your very own Wooyoo The White Belly Bunny.

I hope you had a good time making your very own Wooyoo! Do share photos of your completed bunnies with me through e-mail, Facebook or Instagram (#theamiproject). I’d love to see them! 🙂

Till the next project. xoxo

Copyright Notes: 

This pattern is an original pattern by Serena of The Ami Project (August 2015). Kindly do not claim this pattern as your own or repost it elsewhere. However, if you would like to share this pattern, you may provide a link to the pattern. If you sell the items made from this pattern, kindly credit “Serena – The Ami Project” as the designer and link back to my website (www.theamiproject.wordpress.com). 

© Copyright 2015 Serena Chew (The Ami Project)

Originals: Wooyoo The White Belly Bunny

Hi everyone!
Can you all believe that it is August already? It felt as though the first half of the year had flew by pretty quickly. I had been caught up with a relocation and studies which pretty much explains my absence from here (though I was still moderately active on Instagram).

Anyway, if you have been following me on Instagram, you would have noticed that my Instagram account recently achieved the 500 followers mark. Therefore, to celebrate this milestone and to thank you awesome people, I had decided to release my first ever free pattern for Wooyoo The White Belly Bunny!

Some months back, I did a craft swap with one of my friends, Rachel Liew. I requested for some of her beautiful hand carved rubber stamps while she requested that I crochet an amigurumi based off her beloved pet rabbit, Wooyoobun. She even provided me with a sketch of how she wanted the amigurumi to look like.

Bunny Sketch

Isn’t Rachel’s sketch just too adorable? I love the bunny’s chubby cheeks and the little details on its face. When I received her sketch, I was super excited to make her sketch “come alive” in amigurumi form.

For the bunny’s head, I decided to start off with a series of chains and crocheting around those chains (instead of the usual magic circle) to get an oval shape head.

Head_001

Before I proceeded further with the head, I used the tail from the beginning chain to close up the holes that was visible on top of the head. Then I tied a knot at the back so that the sewing would not unravel.

Head_002 Head_003 Head_005

To create the bunny’s chubby cheeks, I made consecutive increases at the area where I wanted the cheeks to be at. Then I continued crocheting evenly for a few rows until I was satisfied with the size of the bunny’s head. To close up, I made some sharp decreases so that the chubbiness of the bunny’s cheeks would be maintain. 

Head_006 Head_007 Head_008

For the bunny’s body, I started off with a magic ring and widen it at the belly area and subsequently decreased slightly for a slimmer upper body.

Body_001 Body_002 

Next, I worked on the bunny’s ear. I crocheted two long oval shaped ears in grey and two little pink strips as the inner ears. The pink strips are sewn in the centre of the ears right before the last round of the ears. Don’t they resemble bunny ears now?

Ears_001 Ears_002

Then I worked on the bunny’s arms. The arms are a little different from usual. I worked a few rounds at the start and then, for the upper part, I crocheted in rows instead. This is to make the arms resemble the pose in the sketch, that is the top part of the arms are attached to the body and the bottom part pokes out a little.

Arms_001 Arms_002

Then I crocheted two little grey feet for the bunny, two little white feet patches and a white bob tail, as well as its white belly!

Feet_001 Bob Tail_001 Belly_002

Now is the time for sewing all the parts together.

First the body is sewn onto the head. Next, is the white belly. Then came the little arms and feet.

Assembly_002 Assembly_003 Assembly_005

For the facial features of the bunny, I cut out two circular shapes of black felt for the eyes and two smaller circular shapes of white felt for the eyeballs. As for the cheeks, I cut out two oval shapes of pink felt. After glueing them onto the face, I worked on the nose by embroidering it on with some black thread.

Assembly_007 Assembly_006

Lastly, I sewn on the ears onto the head and the bob tail at the back of the body. After hours of hard work, Wooyoo The White Belly Bunny has finally been completed. Bunny_001

Isn’t Wooyoo such a darling bunny? I really adore the little details on its chubby face. Wooyoo is capable of sitting upright without leaning on anything thanks to its two little feet and its bob tail.

Bunny_002

And here is another photo of Wooyoo from the back with its cute little bob tail. It kinds of resembles Totoro from the back.  Bunny_004 I hope you enjoyed reading about the creation process of Wooyoo The White Belly Bunny. The pattern for Wooyoo will be available within the next few days so stay tuned for that. 

Before I end the post, I would like to thank Stephanie from All About Ami for giving me the inspiration to write a step-by-step post to complement the pattern. I had contacted Stephanie prior to releasing this post and she has been so generous and kind about me doing this. Thank you so much, Stephanie! 

Till the next project. xoxo

Blog Stuff: Year In Review – 2014

PhotoGrid_1420024477454

Can you believe that today is the last day of 2014? Honestly, where did the year go?

2014 has been an amazing year for me and here are some of the highlights:

  • Reached 363 followers on Instagram.
  • Started a little online crochet shop on Facebook.
  • Participated in my first ever craft bazaar. (Read more about it here.)
  • Leveling up my crochet skills especially with the elephant by All About Ami, Bibi the Ballerina Bear by Smartapple Creations and the large huggable bear by A Morning Cup Of Jo Creations.
  • Meeting one of my crochet idols, Mei from Amigurumei in person at the Hello Kitty Crochet book signing event.
  • Visiting the yarn stores in Bangkok, Thailand. (Read more about it here.)

I am truly grateful and thankful for all the love and support that has been shown to me thus far. Here’s to achieving more goals in 2015 and I certainly look forward to sharing more of my crochet journey with you next year.

Have a Happy New Year!